Recent News
Are Laminate Cabinets Inferior to Wood Cabinets?
Home Made Cabinets VS Store Made Cabinetry
Veneer Cabinets Versus Wood Cabinets
Contact us
-
62910 Boyd Acres Road)
Suite 12
Bend, OR 97701 - appointments@chestercabinets.com
- 541-389-8130
-
Mon to Fri - 9:00 to 5:00
(Sunday Closed)
Install It

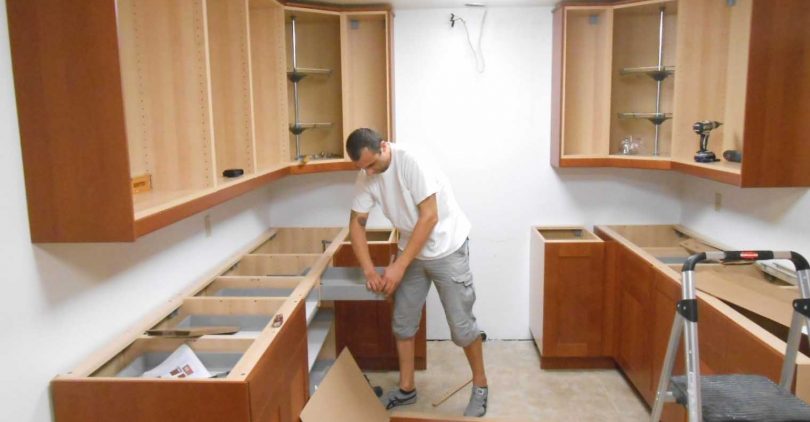
We can install the cabinets for you at a price. If you wish to install them yourself, here is a quick guideline.
Evaluate the New Cabinets
If your brand-new closets are pre-assembled, inspect them as soon as they show up as well as inspect each piece versus your order. Open up the packaging for the assembled kitchen cabinets to ensure you have every one of the pieces– closet boxes, racks, doors as well as cabinet fronts– and also check for damage from shipping. Make sure any type of added trim as well as filler strips that you ordered were included in the distribution.
There are several varieties of ready-to-assemble kitchen cabinets. If the closets you bought requirement to be put together, now is the moment to do that, however don’t attach the closet equipment, doors or drawer fronts yet.
Find High Spots on the Floor
The very first step in how to mount kitchen cabinets is locating the highest point on the flooring. This is a crucial step, due to the fact that every part of your Do It Yourself cupboard setup counts on the recommendation factor you make. Take your time and get it right.
Kitchen floors, especially those in older homes, are often not flawlessly level and also flat. Think your floor additionally has a high point as well as situate it. Shimming up a cabinet to make it degree and plumb is much easier than reducing all-time low to make it fit square and also flush.
To locate the high spot of the floor:
Lay a straight 8-foot-long, 2-inch x 4-inch board on the floor versus the wall surface as well as place a woodworker’s level on top of it.
Shim the reduced end up until you get a level analysis. Location a mark on the flooring to indicate the luxury.
Repeat the above procedure 24 inches out from the wall surface as well, running the straight edge or degree alongside the wall where the front of the cabinets will certainly sit.
Compare the high point on the front of the cabinets with the back, along the wall. Use whichever point is higher as your reference mark.
Mark the Top of the Base Cabinets
Start with marking off the dimensions for the base kitchen cabinets in your installment.
Beginning from the mark showing the high point of the floor, measure up specifically 34 1/2 inches (the requirement height of base kitchen cabinets) and also note the wall surface.
Make a level line at this moment on the wall as well as extend it anywhere in the room that the base cupboards will certainly go.
Dry fit the base cupboard boxes by organizing them, edge piece initially, flush against each other according to your kitchen layout.
Measure, mark and label the area of each closet box on the wall. When making dimensions as well as describes on the wall, keep in mind that the closet face structures on the cupboard front expand past the closet box on either side, to make sure that when the closet face frameworks collaborated, they will certainly yield a room at the rear of the cupboards. Make certain to preserve that area when noting areas on the wall.
Inspect dimensions for dishwasher, sink and stove openings and additionally check that the cupboard doors, if pre-installed, open in the appropriate direction.
Mark Base of Wall Cabinets
Draw a level line 19 1/2 inches over the leading line of the base cupboards that you reeled in the last step. The 19 1/2- inch measurement permits a 1 1/2- inch-thick counter top plus 18 inches for a code-defined distance between the closets and also counter tops.
Mark and label the position of every one of the upper cupboards on the wall with a pencil as well as level to verify your format.
Strategy to mount wall surface kitchen cabinets initially. That way, the base cabinets won’t be in your way while you’re installing the top cupboards.
Locate Wall Surface Studs
Utilize a stud finder to find the wall studs. You’ll wish to screw the closets right into them for protected installation.
Mark the facility of the studs with a pencil.
Extend the lines backwards and forwards the wall surface with a woodworker’s degree, ensuring you keep the lines plumb.
Transfer the stud area marks to the back of the cupboards and pierce a little pilot hole on top and also base of each cabinet. This will certainly make it much easier to attach to the stud.
Select Suitable Hardware
Along with the right tools to install closets, it is essential to choose the ideal equipment for your wall surface type.
Installation on the Wall Stud:
Mounting to a wall surface stud is generally the chosen installation. Usage 3-inch # 10 screws to mount to the wall studs. Several manufacturers provide special washer-head screws made particularly for this purpose. They are the most effective choice right here as they have a washing machine developed into the head.
Drywall Installation:
Usage toggle bolts when placing to drywall, but just when the cabinet can not be attached to a wall stud. Toggle bolts call for pre-drilled holes. Cupboards must likewise be secured to a nearby cabinet.
An alternative choice would be to cut away a 6 to 8-inch band of drywall or plaster behind where the cupboards will certainly attach to the wall (below the line representing the top of the base cupboard, over the line representing the bottom of the top cabinet and also below the line standing for the top of the top cupboard). Set up 2 x 6 blocking between the studs, then cover the location where you eliminated the wall surface finish with plywood so that it is flush with the face of the drywall or plaster.
Begin Edge Installation
When beginning a Do It Yourself kitchen cabinet install, always start behind-the-scenes where two runs of assembled kitchen cabinets will certainly integrate.
Eliminate cabinet doors and set aside.
Transfer the stud areas to the cabinet and also start a screw in the installation rail( s) of the cupboard.
Location the edge cupboard right into position on the wall stud marking.
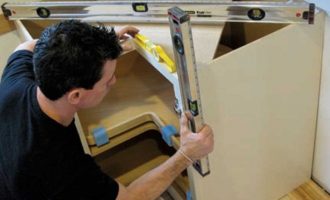
Utilize a degree to ensure that the cabinet is straight. If needed, place a shim to make it level as well as flat to the wall surface.
Mount the cabinet to the wall surface with equipment proper for your wall surface type.
Once the corner cupboards are set up, job outward at either side for the continuing to be cupboards.
Attach Cabinets With Each Other
Once the first cabinet is protected, utilize two or 3 C-clamps as well as attach the next closet to the initial.
Change and re-clamp the second closet up until it is level and also flush with the first one. Place shim as required.
Drill a 1/8-inch pilot hole in the face structure right over or just listed below each door joint area.
Attach the 2nd cabinet to the first cabinet utilizing a 2 1/2- inch, # 8 screw.
Countersink the screw for an even look.
Idea: Never affix cupboards with the side panels. Cupboards must always connect with each other at the face frame.
Set Up Remaining Cabinets
Do not completely tighten mounting screws till all cabinets have been attached with each other.
Drill a 3/16-inch pilot opening at the stud areas through the back panel as well as into the stud.
Degree and place the closet to the wall with a 3-inch, # 10 screw. Place a shim if needed to degree.
After all cupboards have actually been connected together, tighten all the installing screws. Seat the mounting screws securely versus the back, but do not drive the screw head right into the surface.
Inspect to ensure that all closets remain degree after tightening up.
Change Drawers
After you set up all of your cupboards and also change the doors, your Do It Yourself kitchen cabinet install is virtually complete. It might be required to adjust the drawer fronts, so they are all level.
Loosen the screws holding the cabinet glides to the structure of the closet as well as adjust the drawer vertically to align, then tighten the screws.
Drill a 1/8-inch pilot opening through the second hole listed below the cabinet glide and drive a 5/8-inch, # 8 screw to protect the drawer.
Analyze the cabinet drawers as well as doors from the front to check alignment.
These instructions are based upon typical cabinet setup approaches. Read the maker’s instructions on any kind of cabinet installation task and also make use of the advised installment technique for that item. This might consist of hardware or techniques along with what is outlined below.
The devices to set up kitchen cabinets are relatively common for any kind of Do It Yourself house. Nevertheless, you can rent anything you might be missing with The Home Depot tool and vehicle service.
If you are still taking into consideration new kitchen cabinets vs. redecorating old cabinets, know that cabinet refacing items are offered for all kitchen cabinet designs, consisting of kitchen islands, custom kitchen cabinets or ready-to-assemble kitchen cabinets. If dealing with kitchen cabinets as a DIY project appears overwhelming, utilize our cabinet setup services and get professional help.


